- Download MySQL Installer
- Run the Installer
- Installation Process
- Configuration
- Execute and Complete Installation
- Add MySQL to System Path (Optional for CLI Use)
Download MySQL Installer
Go to the official MySQL website: https://dev.mysql.com/downloads/installer/
Choose MySQL Installer for Windows (.msi file). Download the “MySQL Installer (Full)” (larger size) to avoid downloading additional components later.
Run the Installer
Double-click the downloaded .msi file to launch the installer.
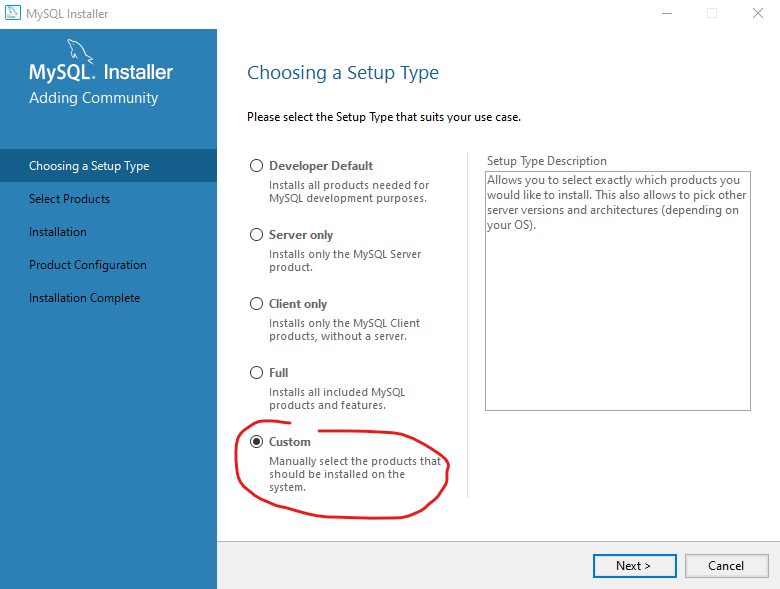
Choose the “Custom“ installation if you want to select components manually or specify install directories for its components.
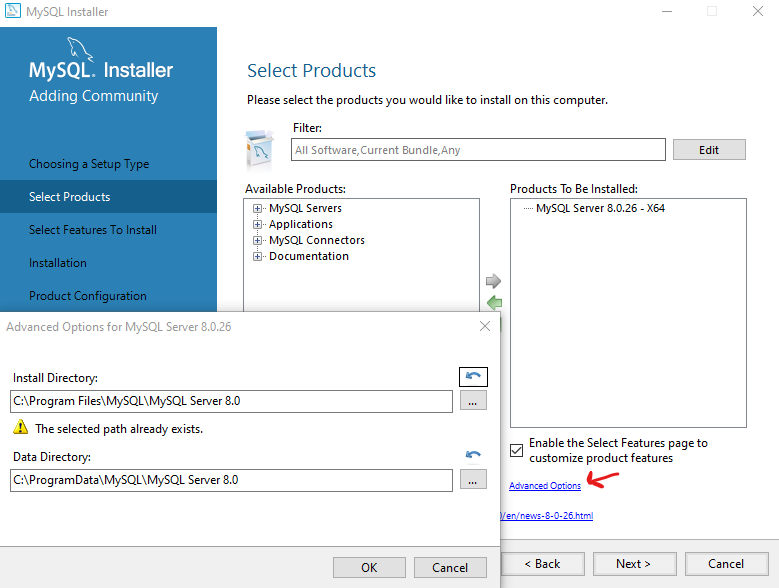
And in the next step, you go to Advanced Options and specify the location to install.
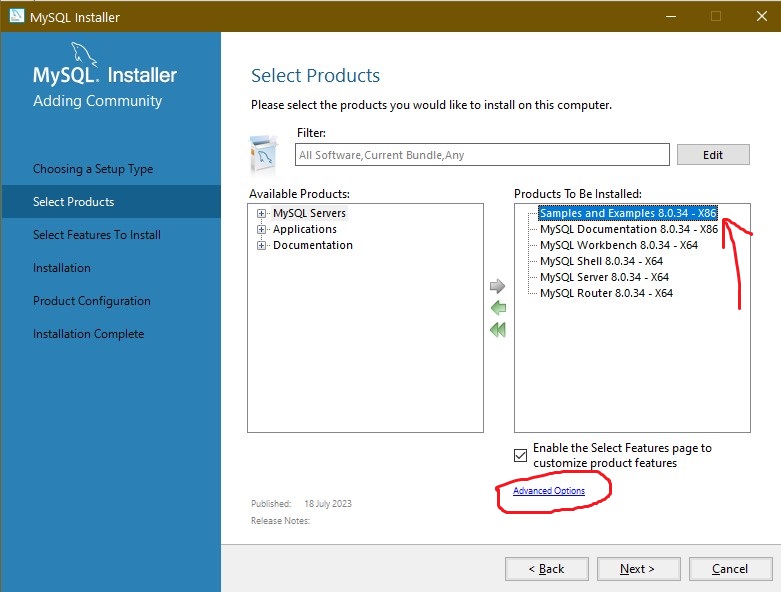
NOTE: Select each item first, then Advanced Options will be visible.
Installation Process
- Click Next to continue.
- The installer may download and install required dependencies like Visual C++ Redistributable.
- Once ready, click Execute to install MySQL.
Configuration
- Server Configuration
- Choose Standalone MySQL Server.
- Select Development Machine for minimal memory usage or Server Machine for production.
- Connectivity
- Leave the default TCP/IP (port 3306) or change if necessary.
- Ensure Firewall Exception is enabled.
- Authentication
- Choose Strong Password Encryption (Recommended).
- Set the root password (keep it safe).
- Accounts
- Create a MySQL user (optional, root user can manage everything).
- Windows Service
- Name the service (default is
MySQL80). - Select Run as a Standard System Account.
Execute and Complete Installation
- Click Execute to apply configurations.
- Once done, click Finish
Add MySQL to System Path (Optional for CLI Use)
- Go to Settings > System > About > Advanced System Settings > Environment Variables.
- In System Variables, find
Pathand click Edit. - Add:
1 | C:\Program Files\MySQL\MySQL Server 8.0\bin |
- Restart Command Prompt and verify:
1 | mysql --version |