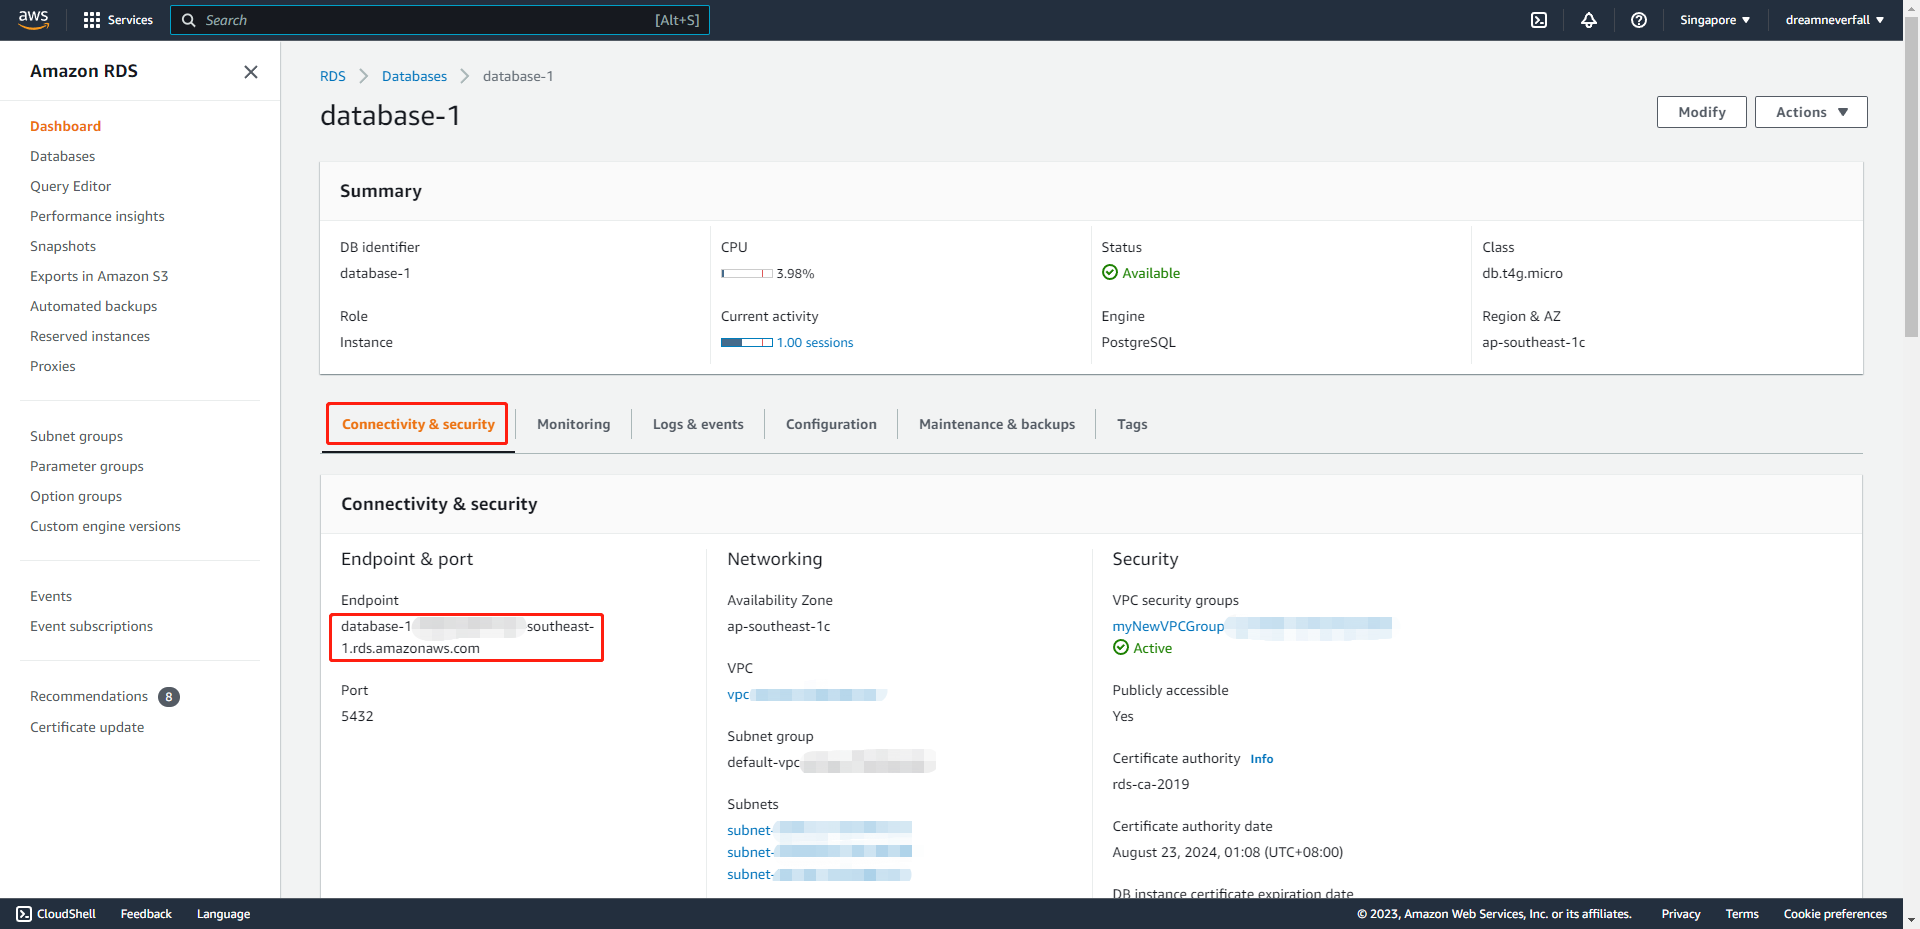
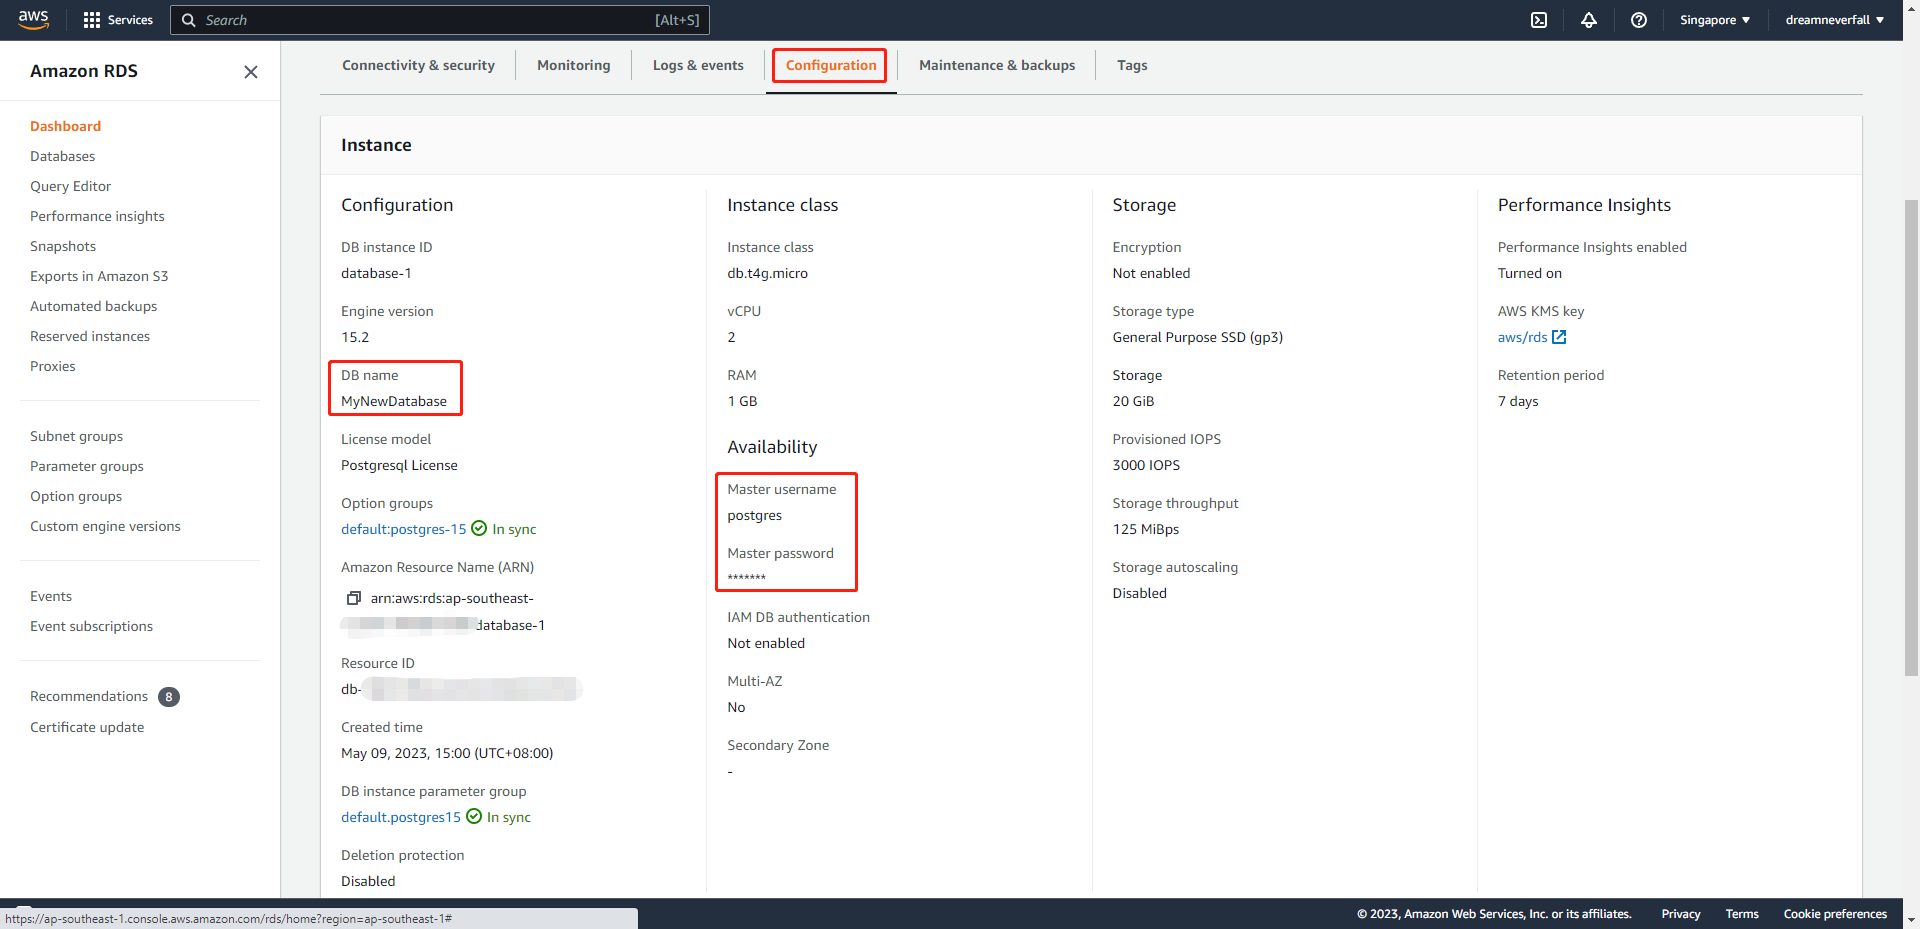
Enter the RDS Console
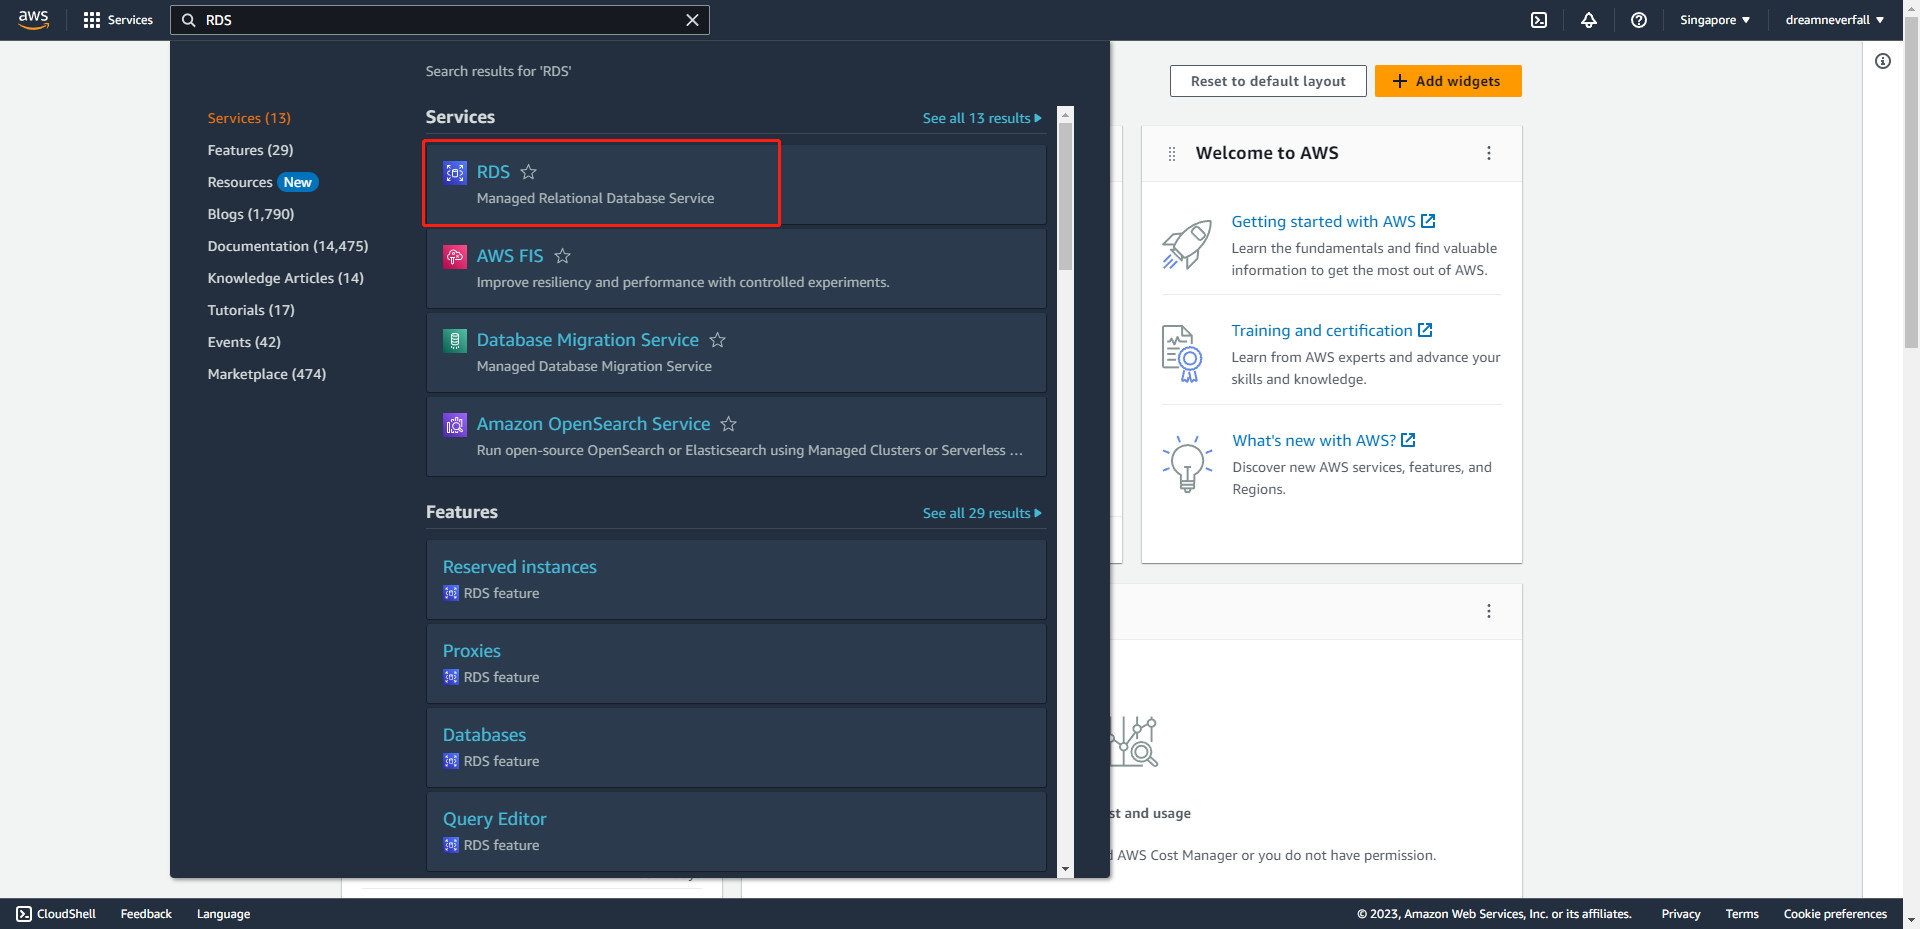
Visit the AWS management console and search “RDS” in the search box.
Create a PostgreSQL DB Instance
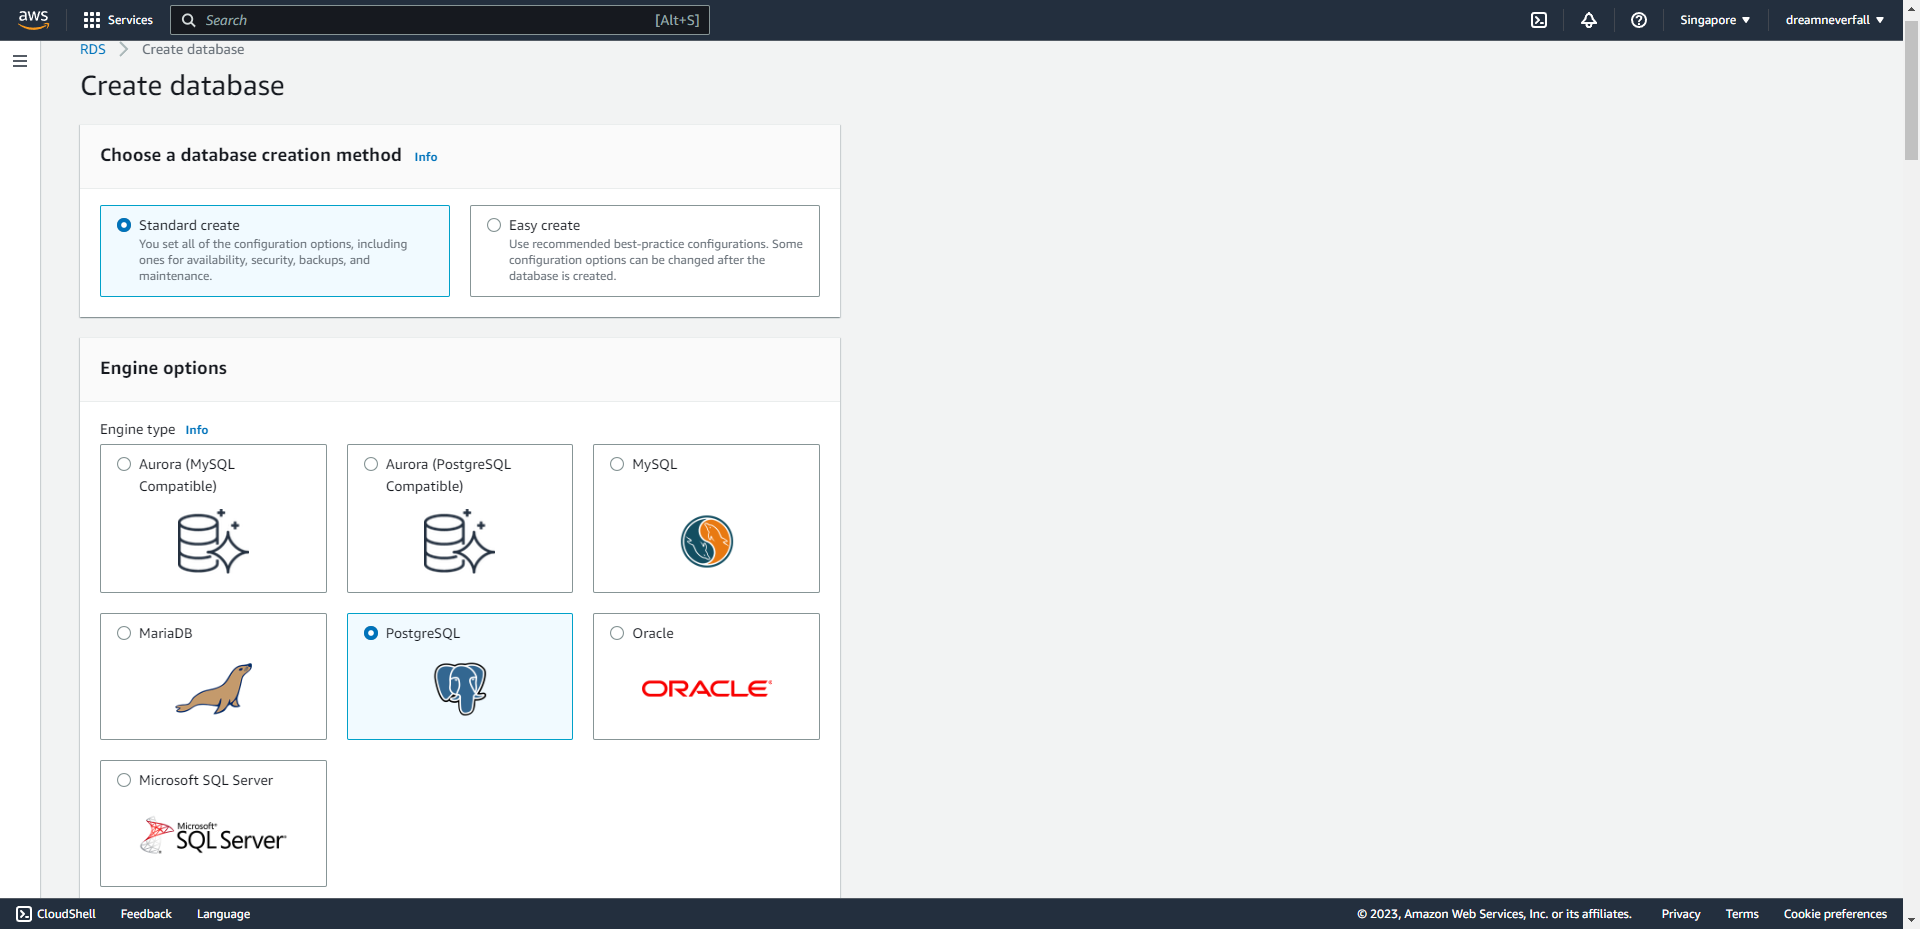
Engine Options
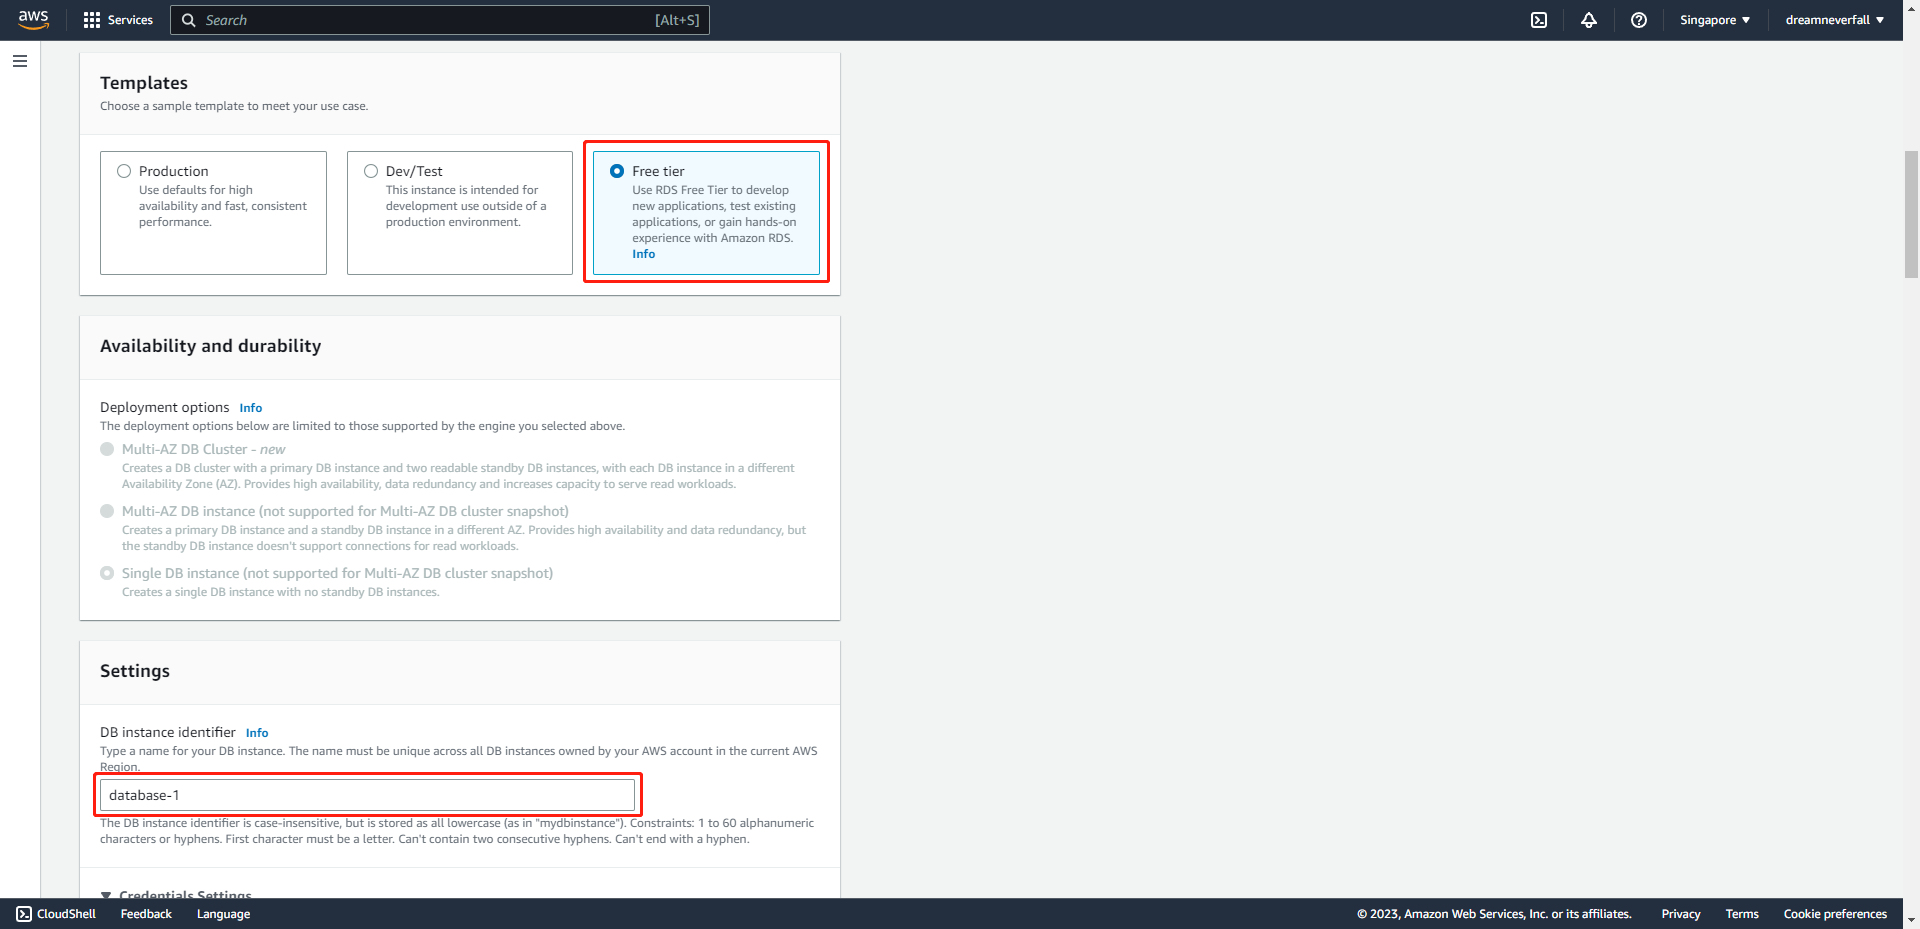
You now have options to select your engine. For this tutorial, choose the PostgreSQL icon, choose Engine Version and choose the Free Tier template.
Settings
- DB instance identifier: Type a name for the DB instance that is unique for your account in the Region you selected.
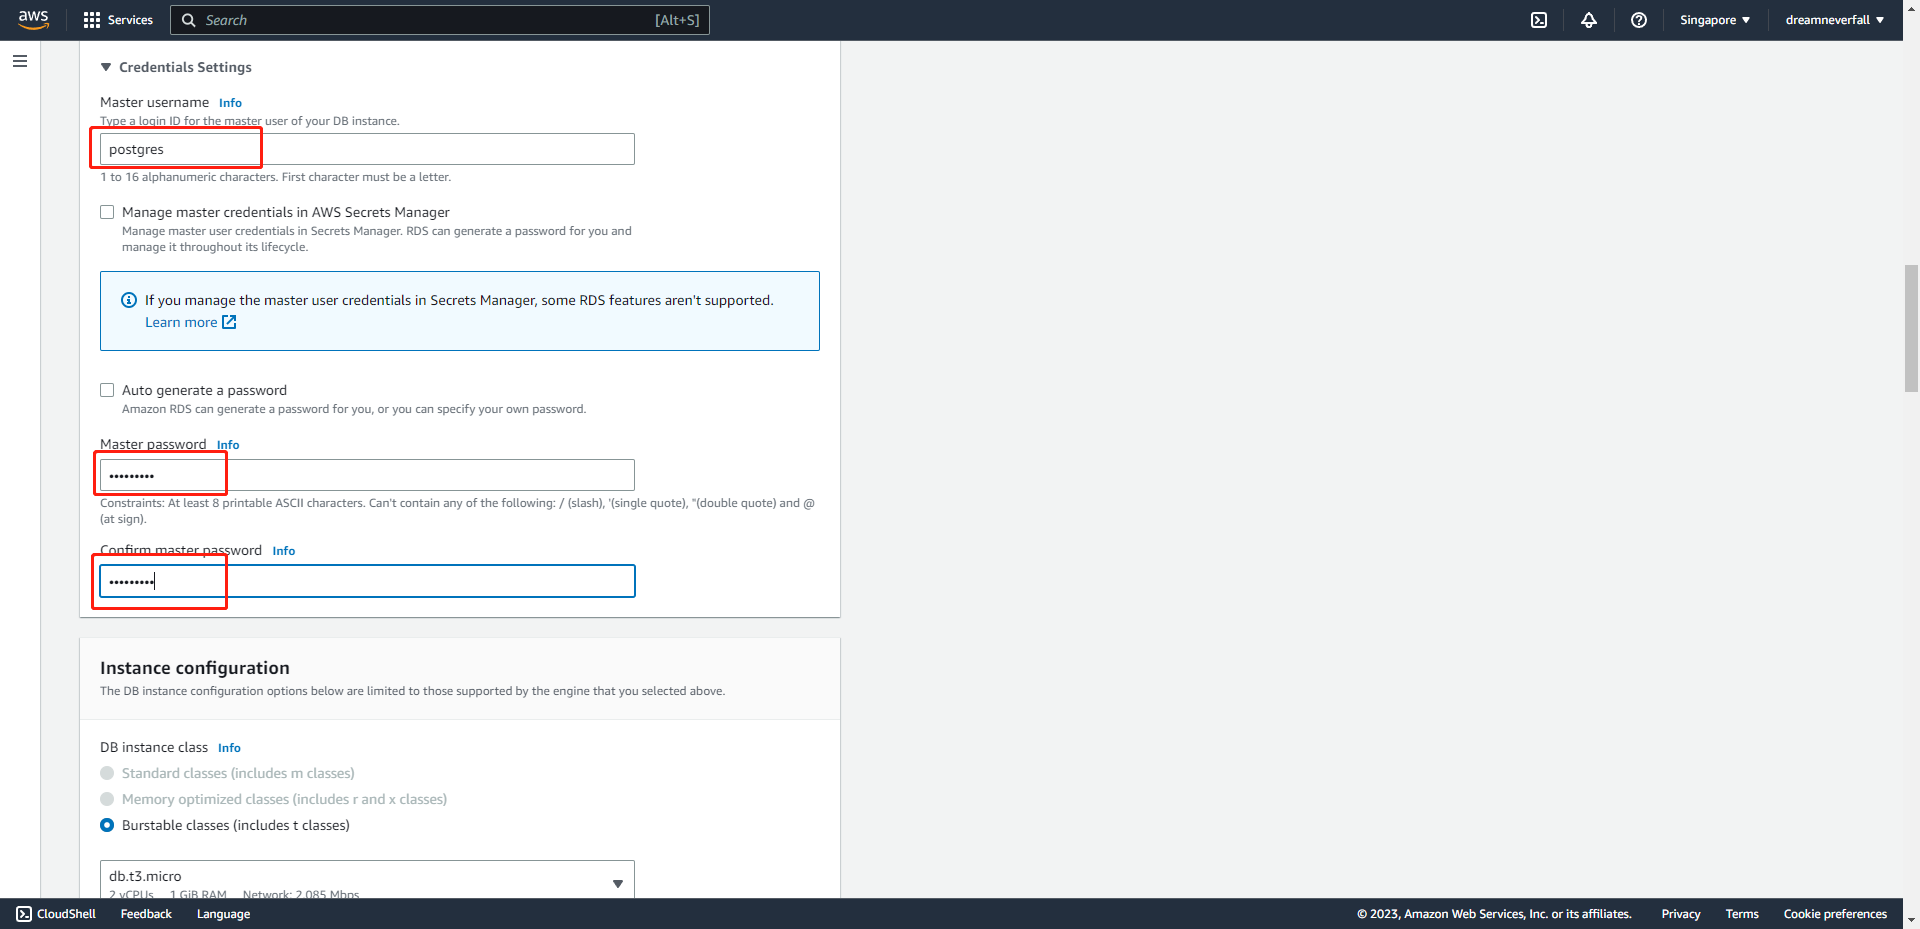
- Master username: Type a username that you will use to log in to your DB instance.
- Master password: Type a password that contains from 8 to 41 printable ASCII characters (excluding /,”, and @) for your master user password.
- Confirm password: Retype your password.
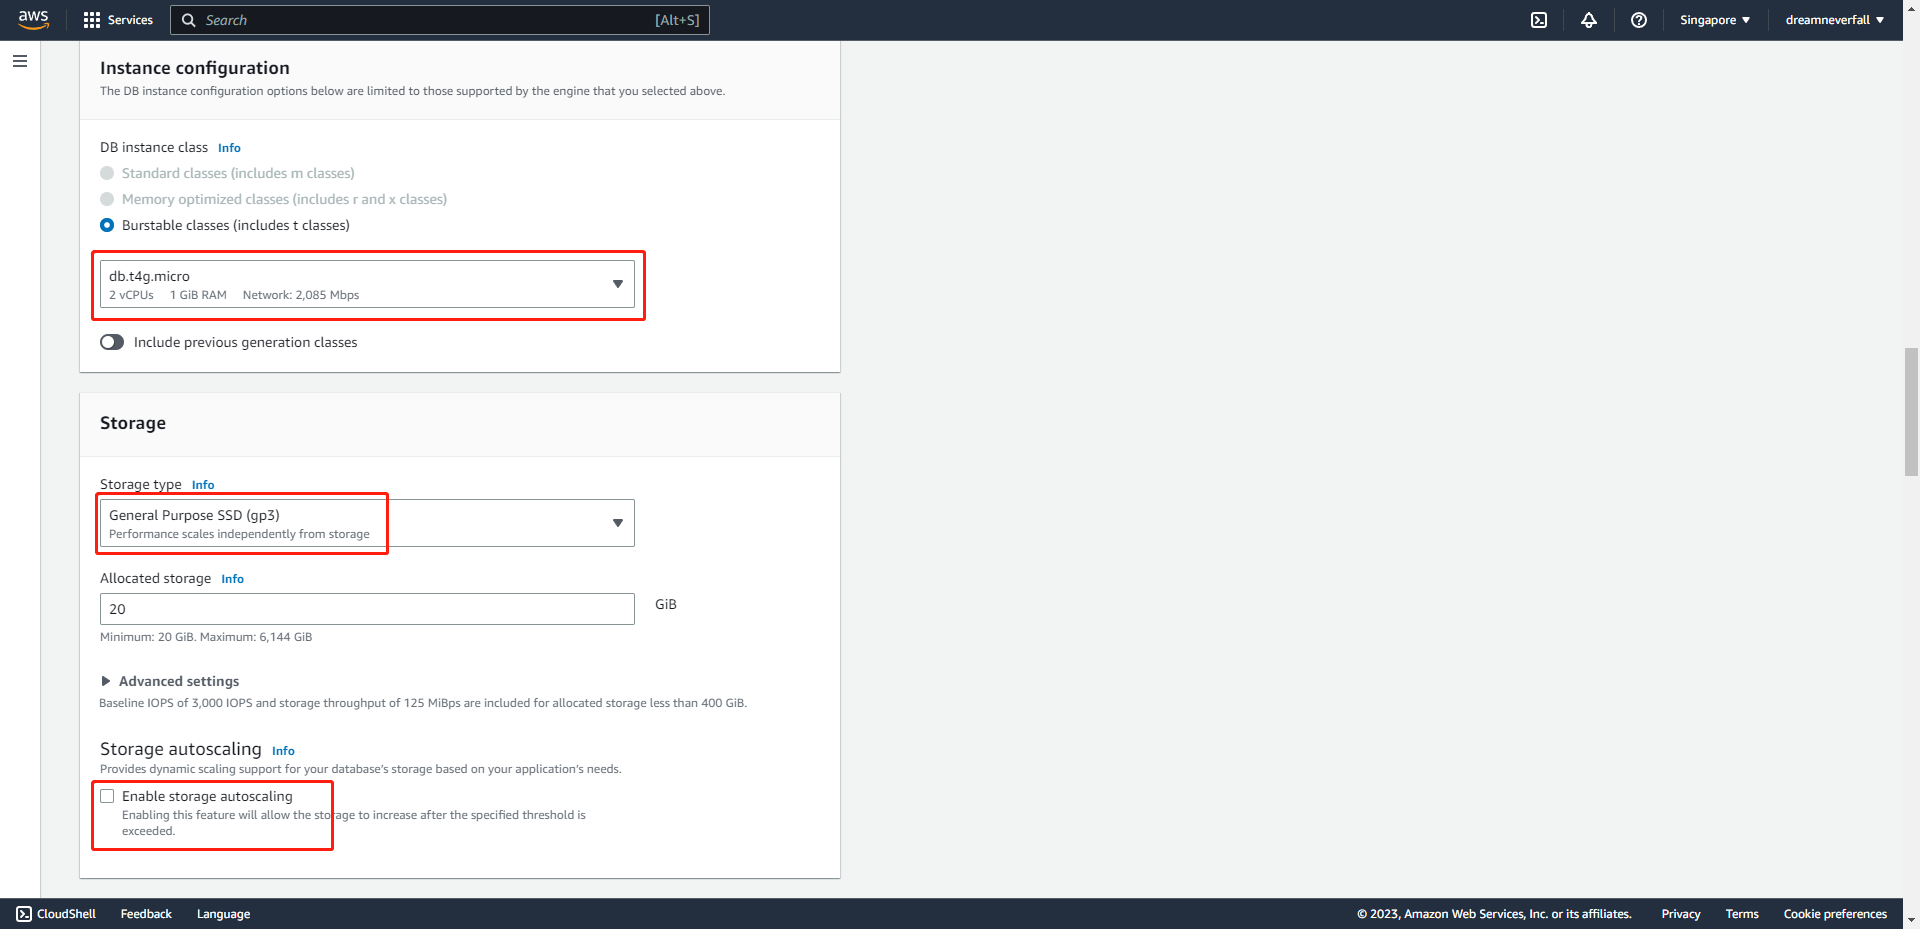
Storage
- Storage type: Select General Purpose SSD (gp3).
- Allocated storage: Select the default of 20 to allocate 20 GB of storage for your database.
- Storage autoscaling: Uncheck this option.
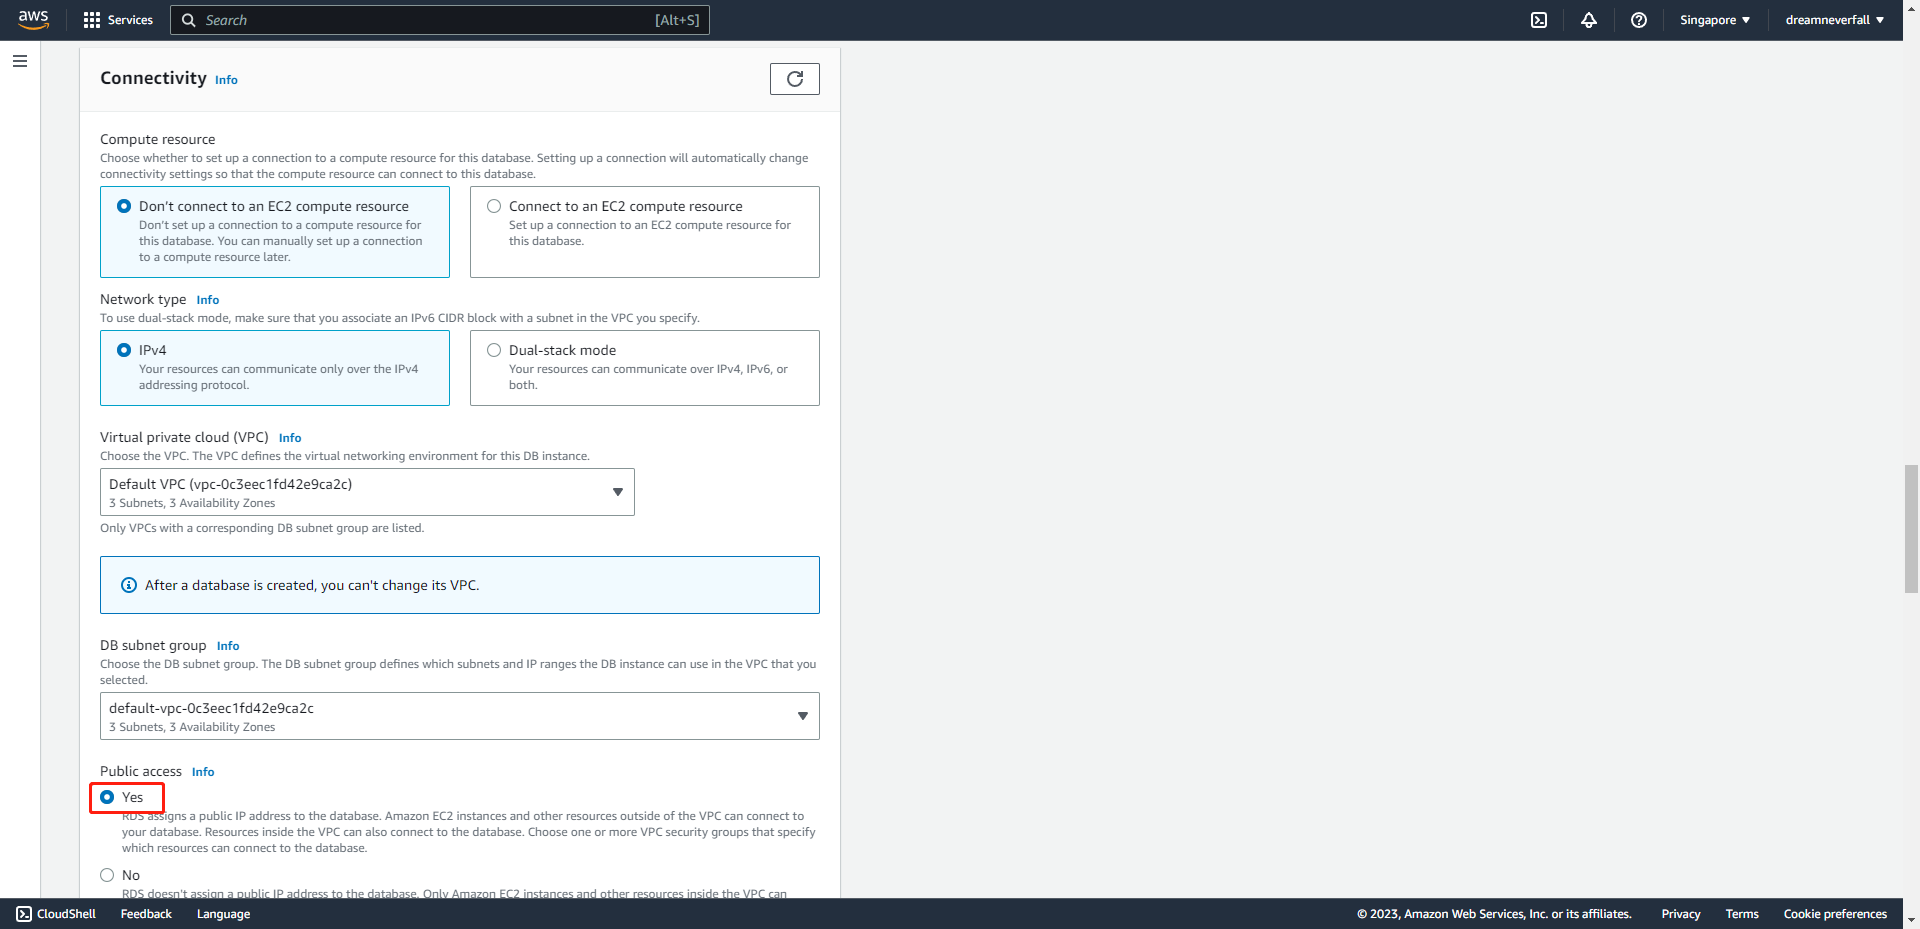
Connectivity
- Public accessibility: Choose Yes. This will allocate an IP address for your database instance so you can directly connect to the database from your own device.
- VPC security groups: Select Create new VPC security group. This will create a security group that will allow connection from the IP address of the device that you are currently using to the database created.
- Port: Leave the default value of 5432.
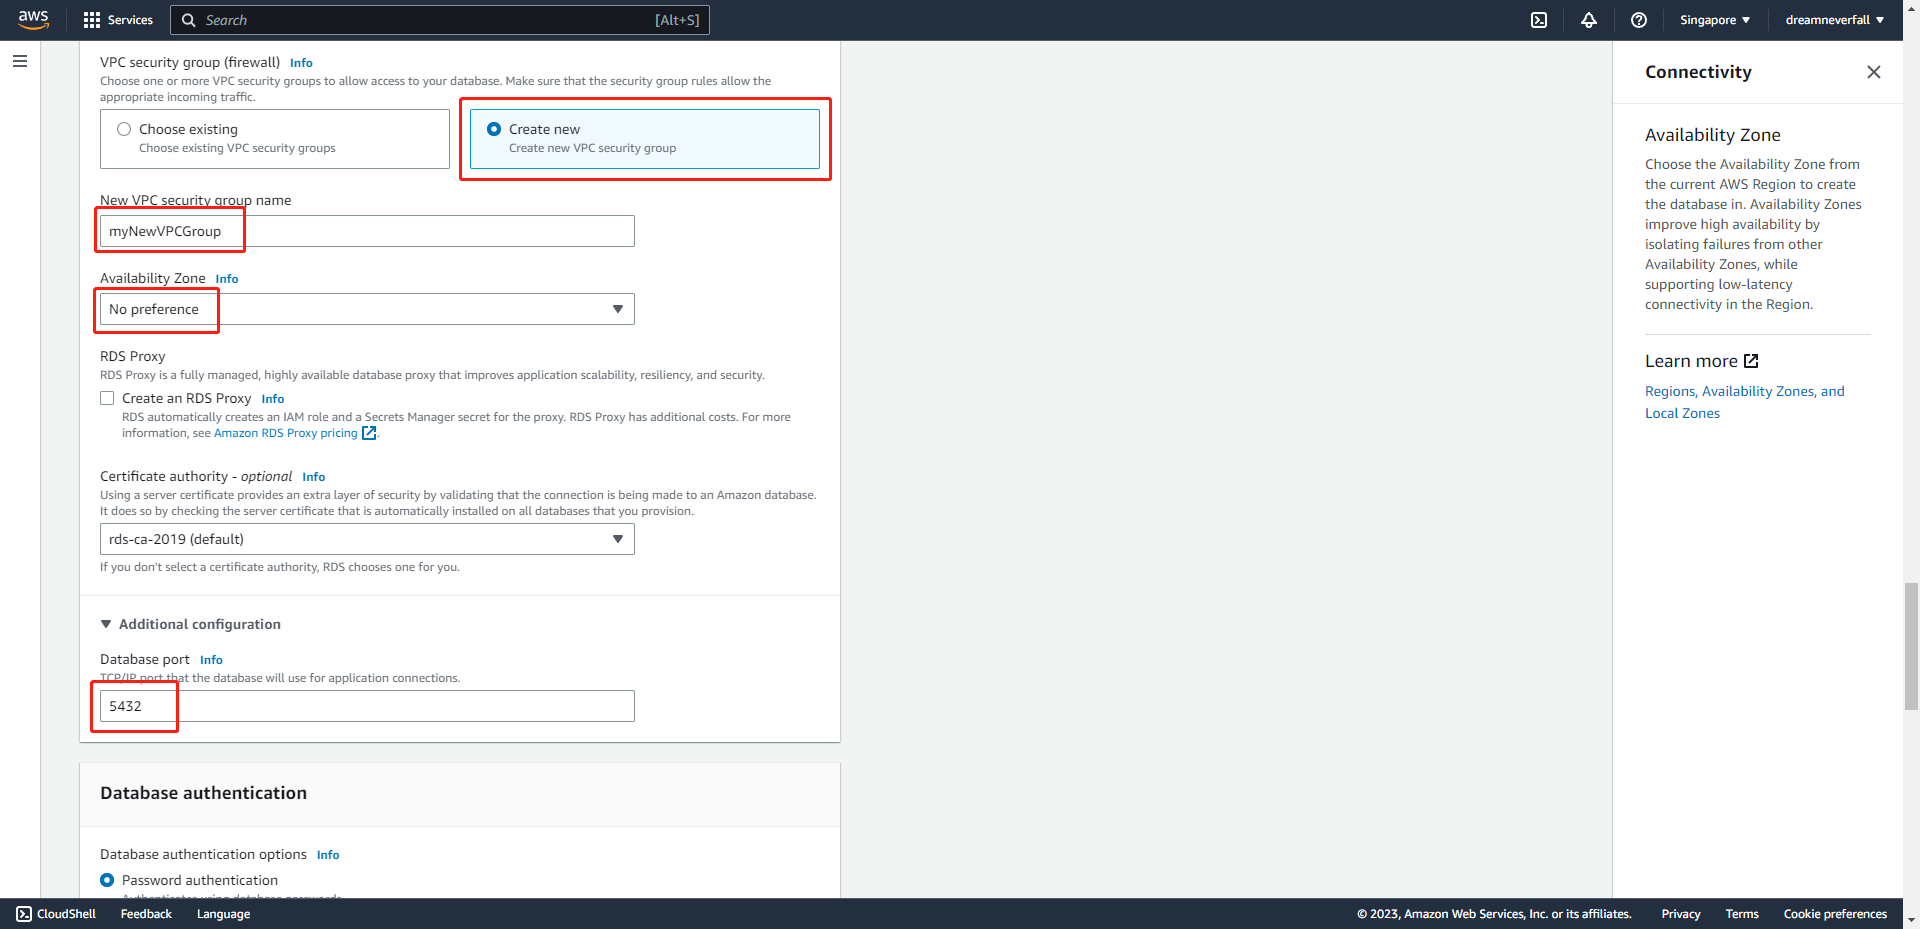
Database authentication
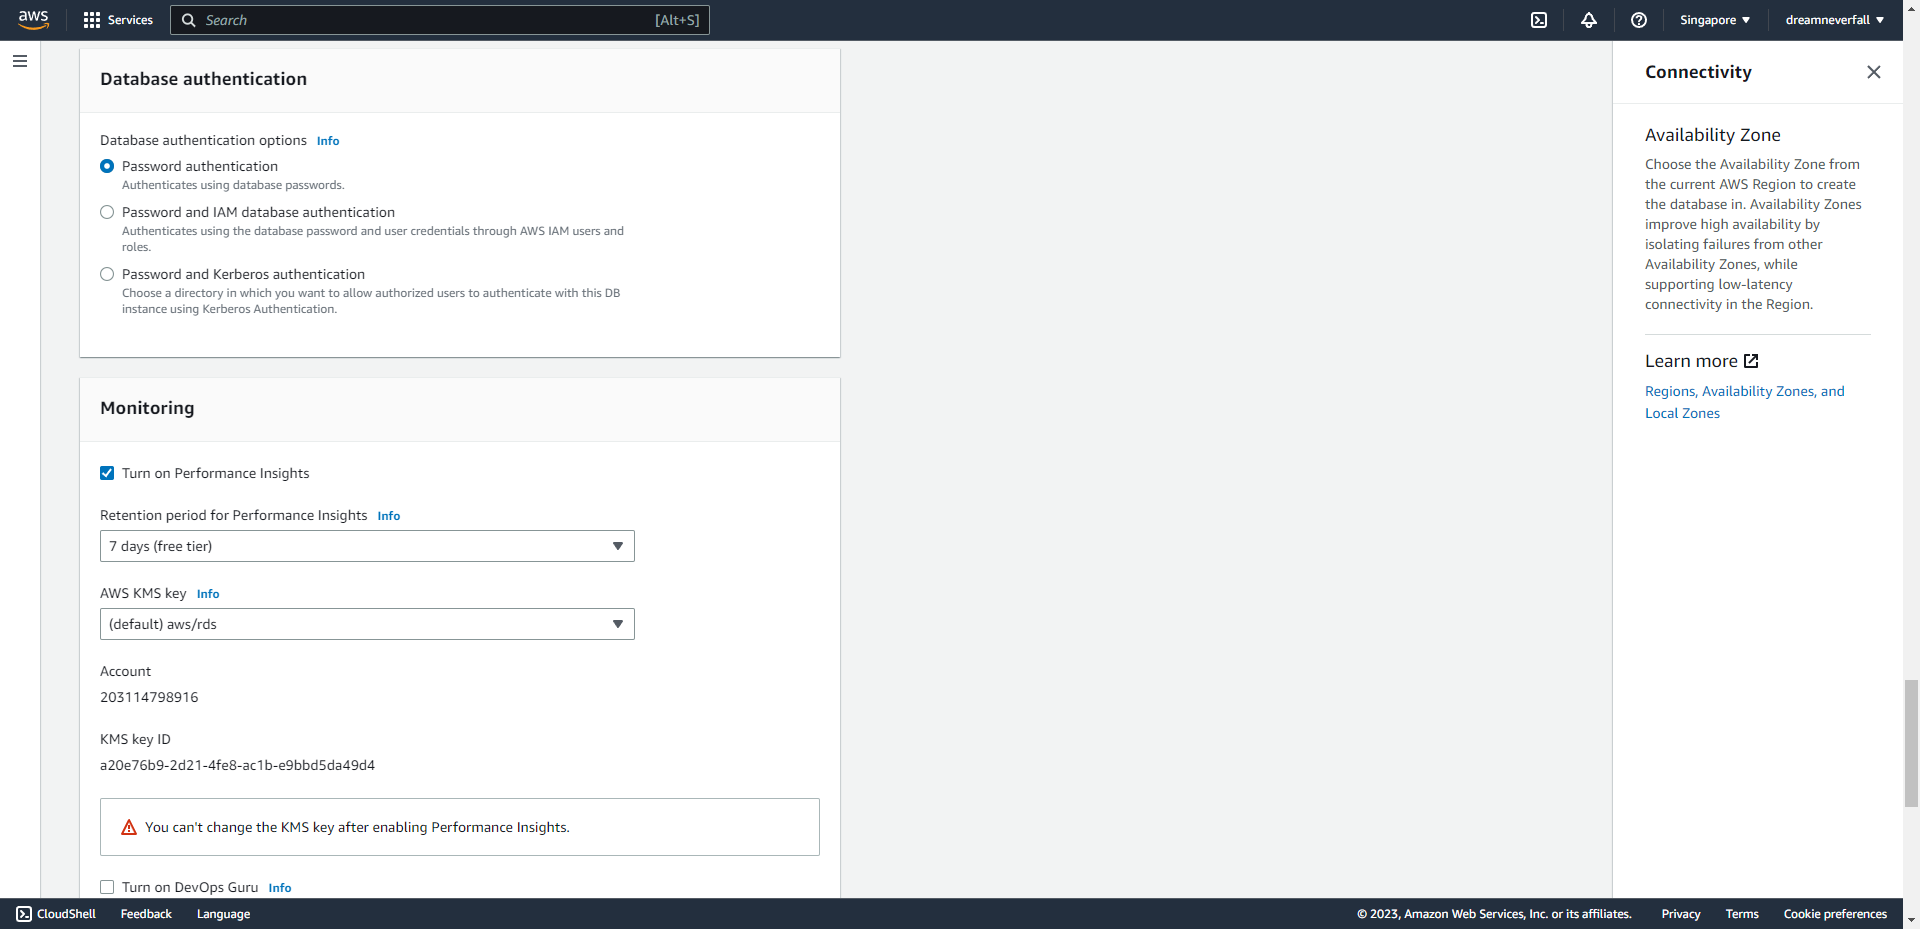
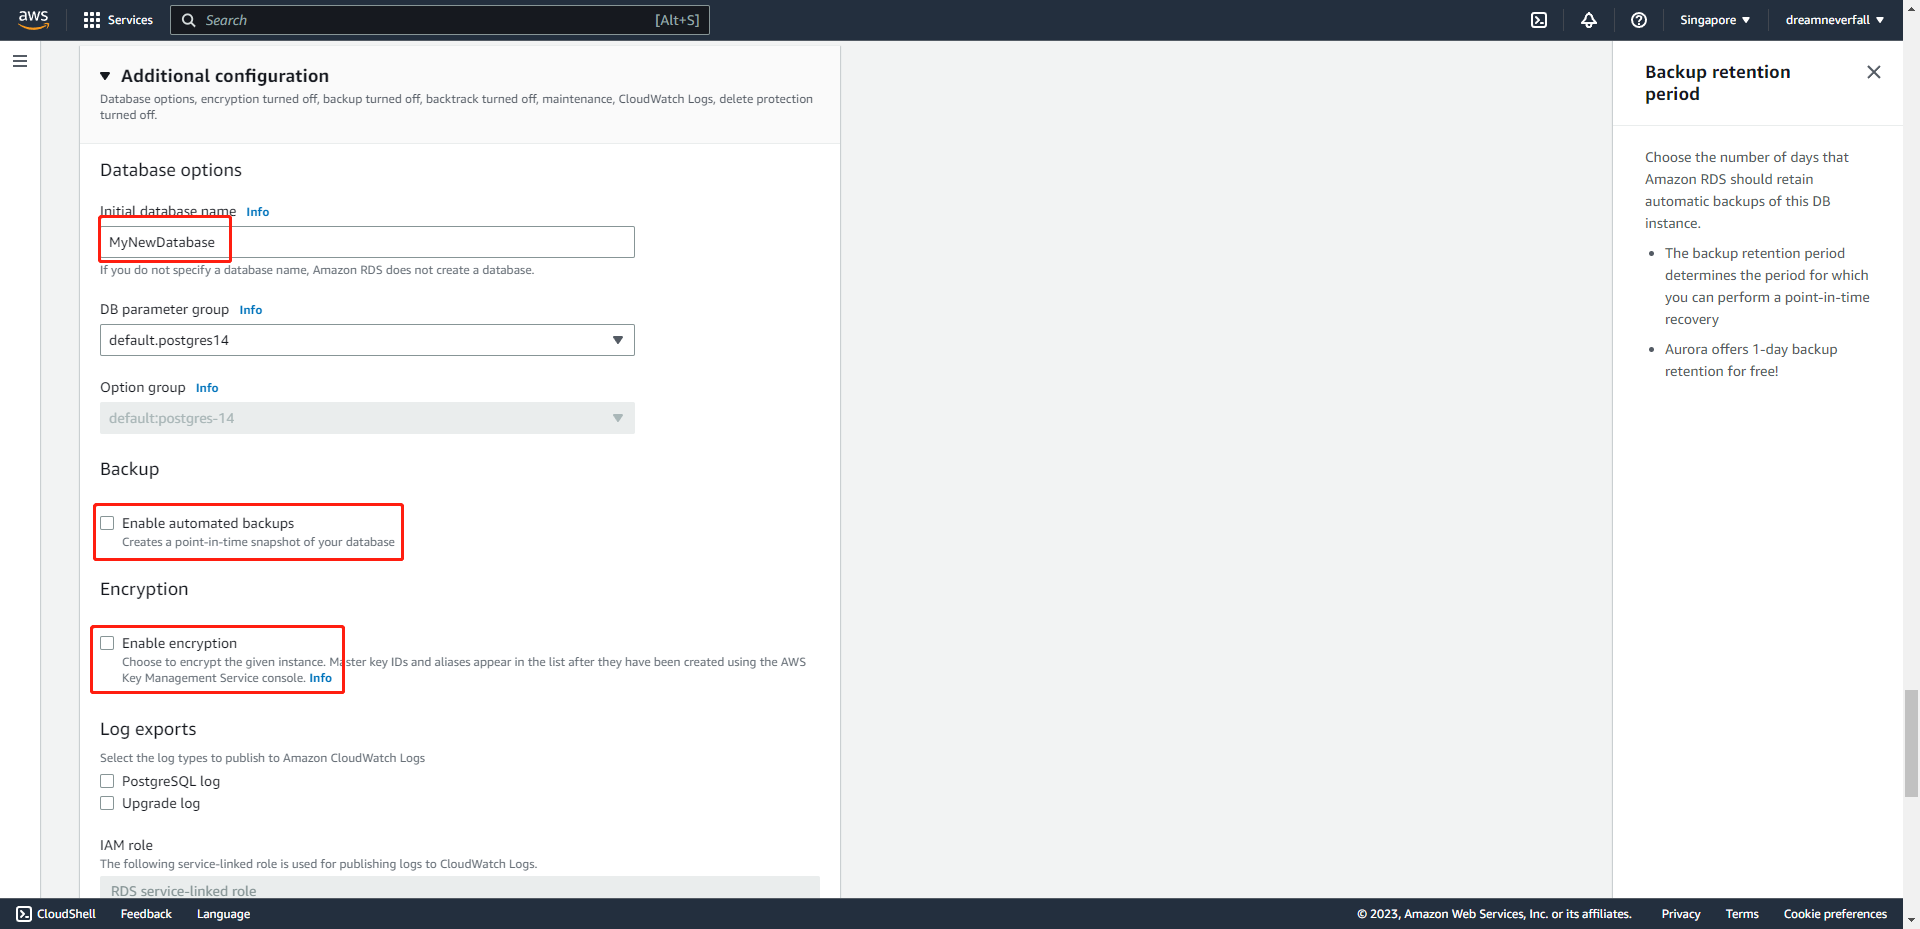
Additional configuration
- Database name: Type a database name that is 1 to 64 alphanumeric characters. If you do not provide a name, Amazon RDS will not automatically create a database on the DB instance you are creating.
- Enable automated backups: Clear this checkbox.
- Enable encryption: Clear this checkbox.
- Auto minor version upgrade: Select Enable auto minor version upgrade to receive automatic updates when they become available.
- Maintenance Window: Select No preference.
- Deletion protection: Clear Deletion protection.
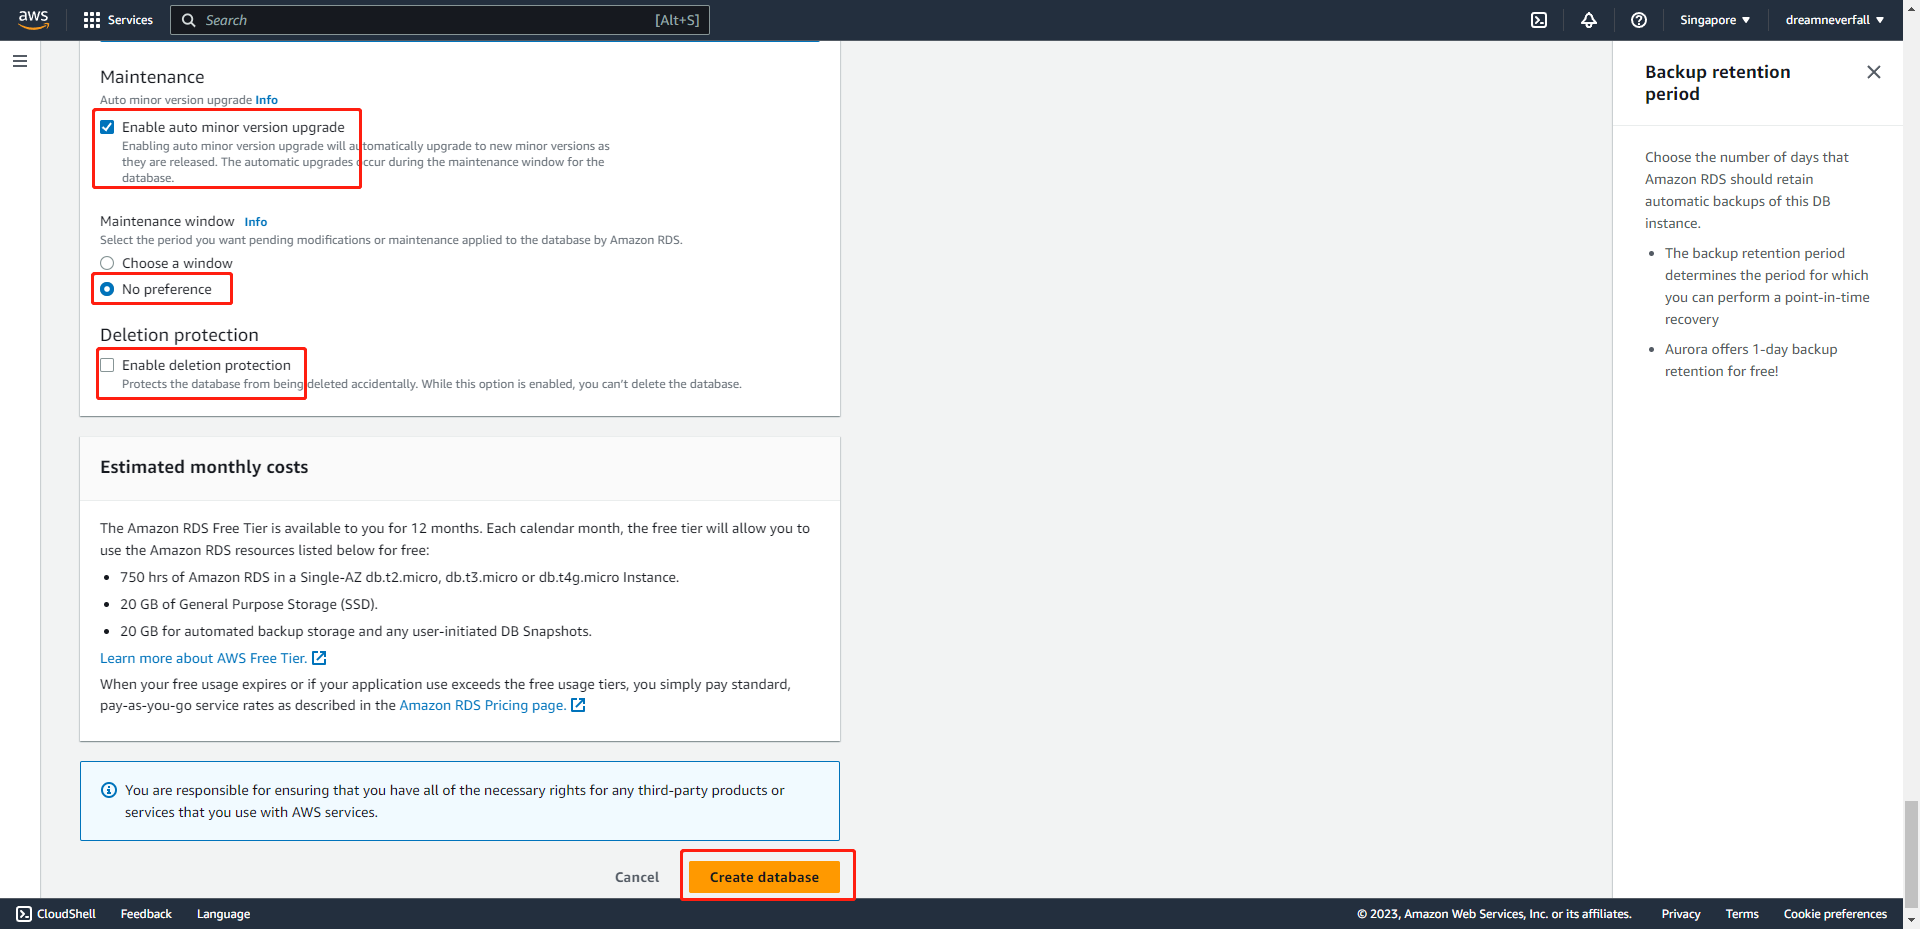
Click Create database.
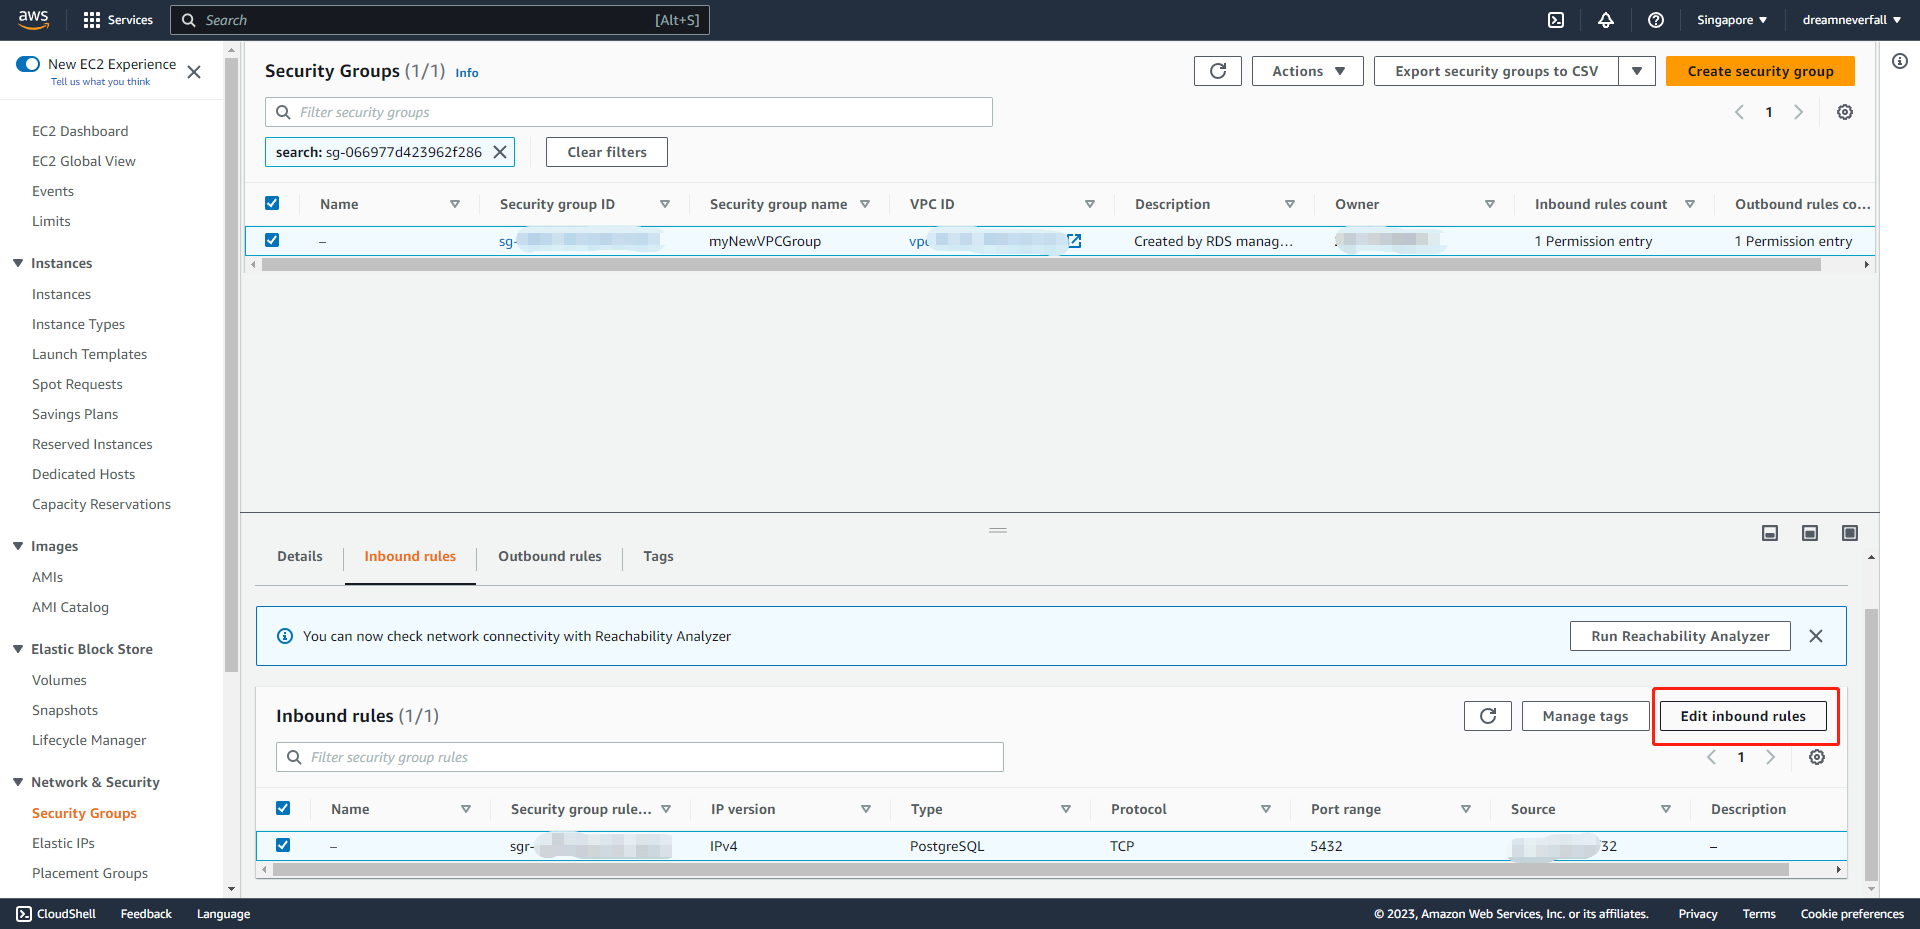
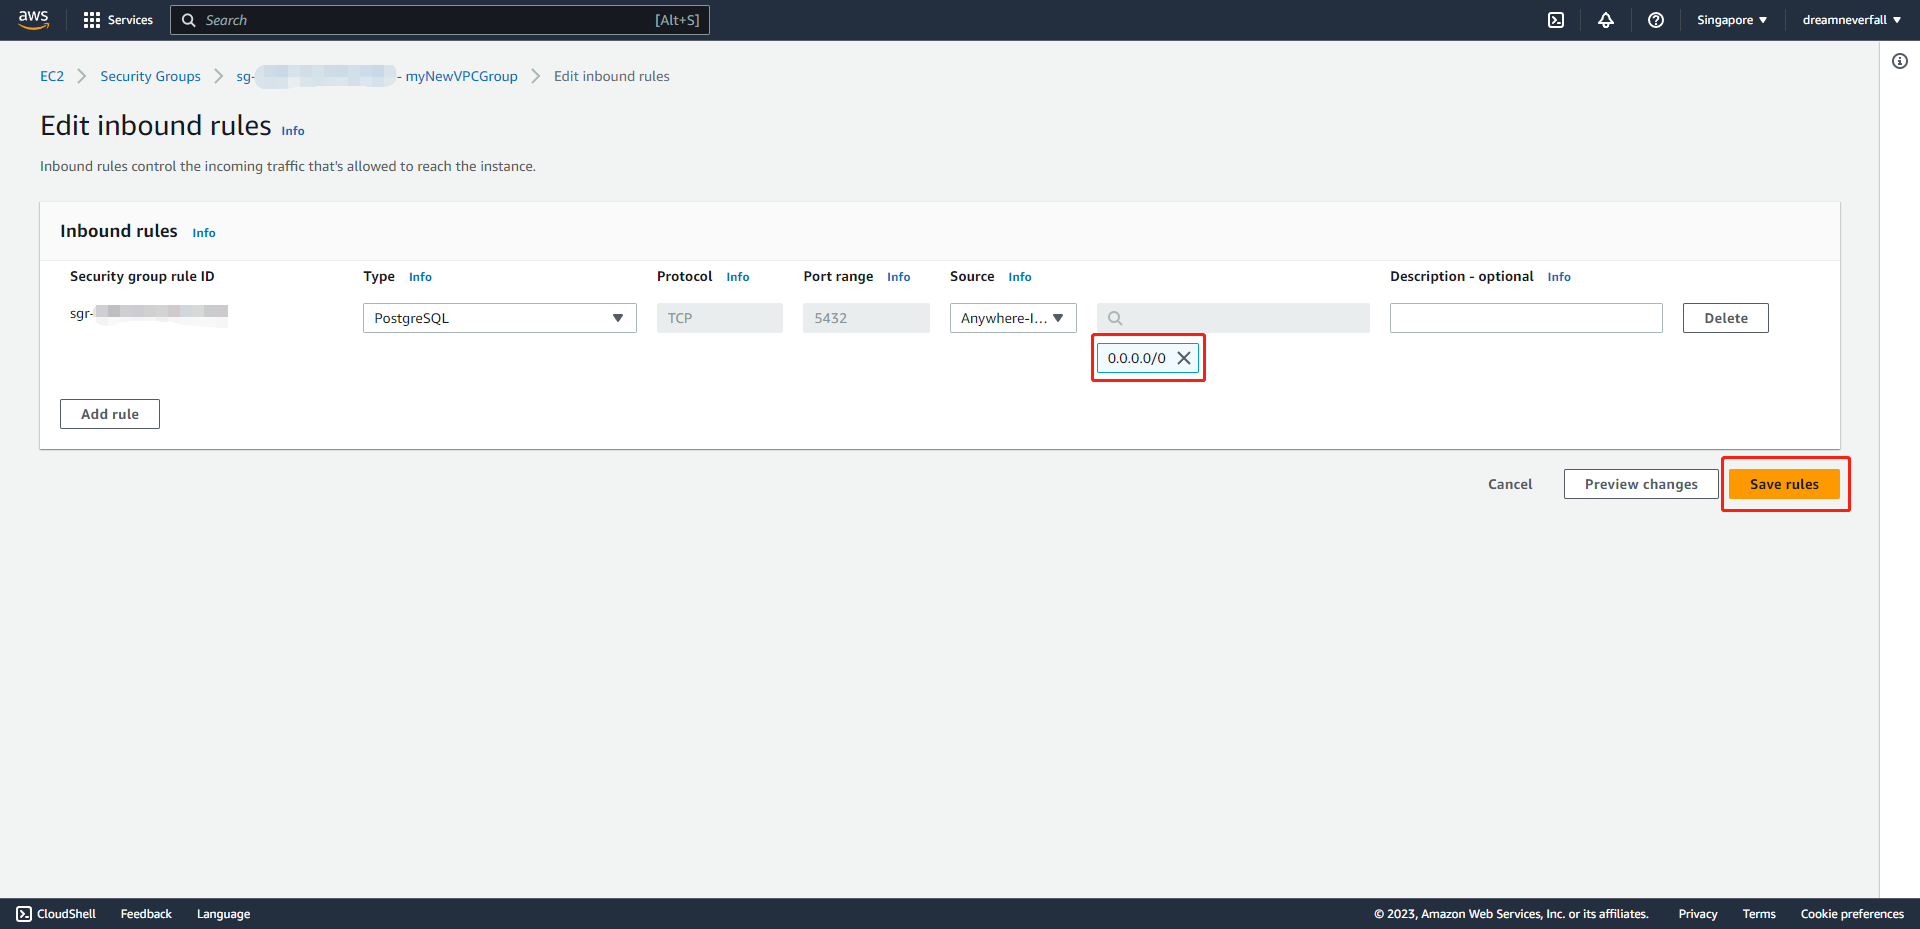
Edit the VPC security group
Database Information
